

Waste not… Those of us who love the outdoors have a vested interest in Reduce and Recycle. No one wants to camp in a landfill. Anything we can do to reduce the amount of trash serves us well.
I live in a very damp environment, literally a rainforest. I have had to throw away many items due to mold damage and that just ticks me off. After spending a small fortune on DampRid for car and home only to have to then throw the used bags into a landfill or pour the weird liquid down the toilet, I knew there had to be a better solution.
Enter Dry & Dry.
This reusable desiccant is appropriately named. It absorbs moisture in its tiny silica beads, then you can dry out the beads in a slow oven or, as I did, on top of a wood stove. And they are non-toxic.

I put up a photo of my truck camper build and received many inquiries about this amazing product. So many, in fact, that I decided to put up this little blog post to share with everyone how Dry & Dry works for me. Condensation in a camper is a big challenge and is a highly discussed topic on the camper forum. My solution has worked well to manage excess moisture and here is how I did it.( I have included links to the items you will need at the bottom of this post.)
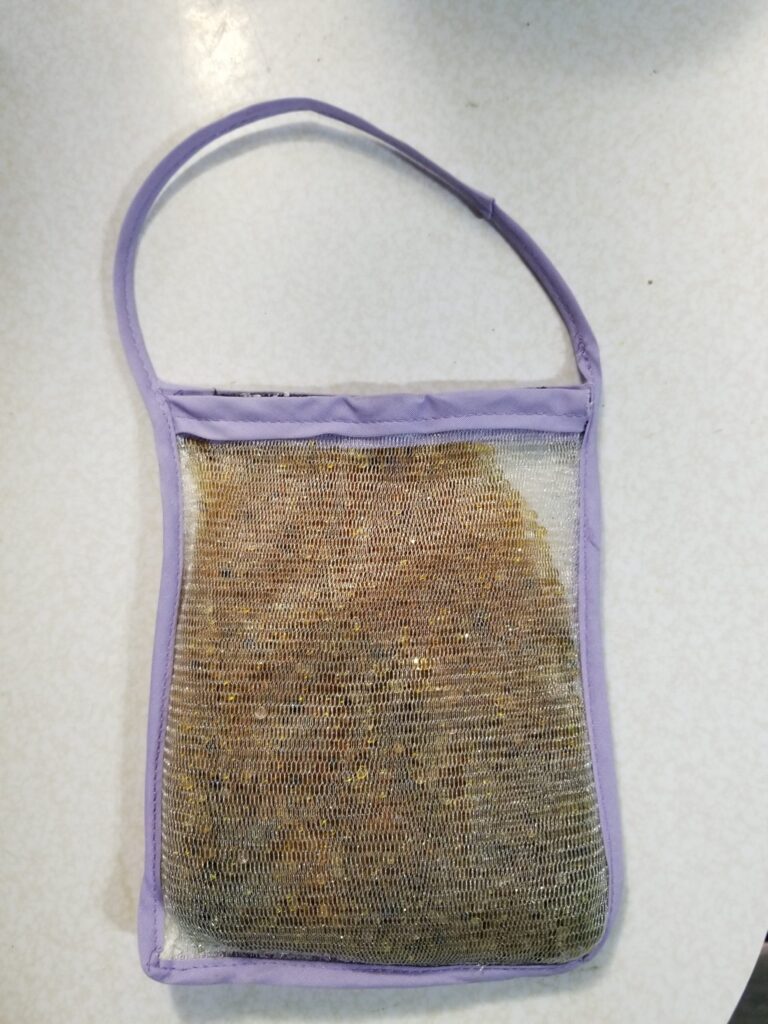
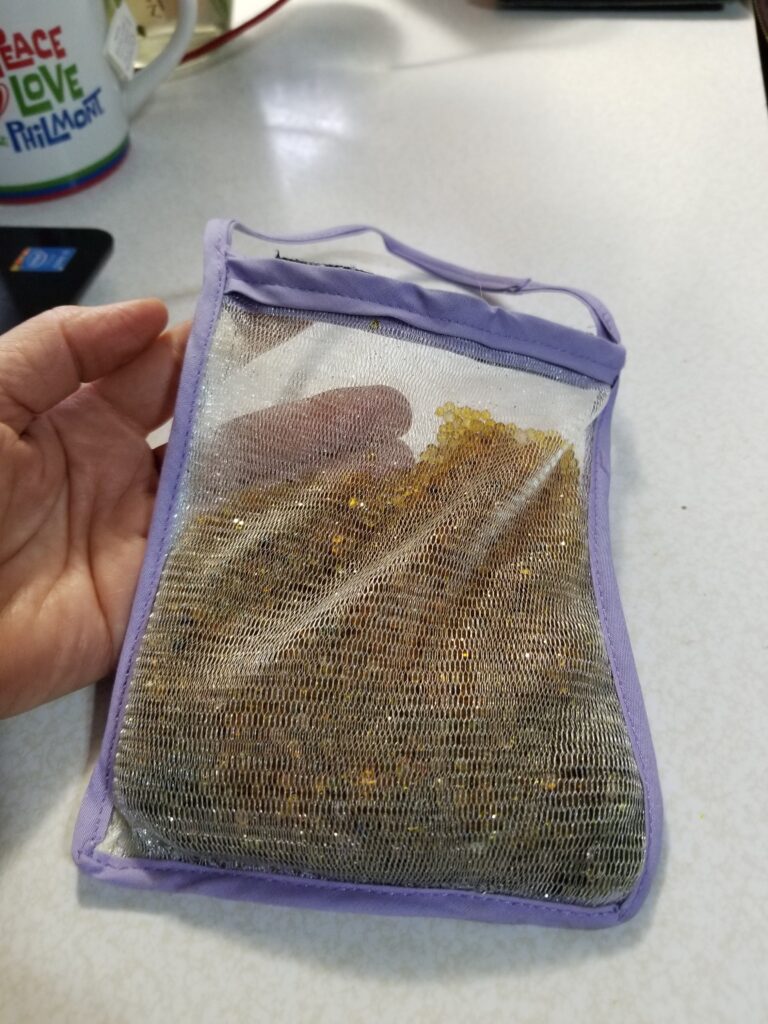
I made small mesh pouches to hang around my camper, especially near my face while sleeping since that seems to be when most of the moisture inside the camper occurs. I used non-cotton mesh fabric to avoid mold and doubled the fabric, then sewed little pouches and covered the edges with double-fold bias tape. I extended this tape to make a handle. I used sticky-back Velcro for the closure because sewing through Velcro on such a narrow area is not fun. (this Here is how simple drying the beads actually is. The directions say to put them in a slow oven (about 225F) for a half hour or so. Where I am, we use propane which produces a lot of moisture as it combusts; a “wet” heat, they call it. The wood stove was already burning and wood makes a “dry” heat so I decided to try that first. I spread the beads on a tray and set it on my wood stove. I stirred them around to encourage even drying. Once the green beads turned orange, I took them off the stove and set them aside to cool.
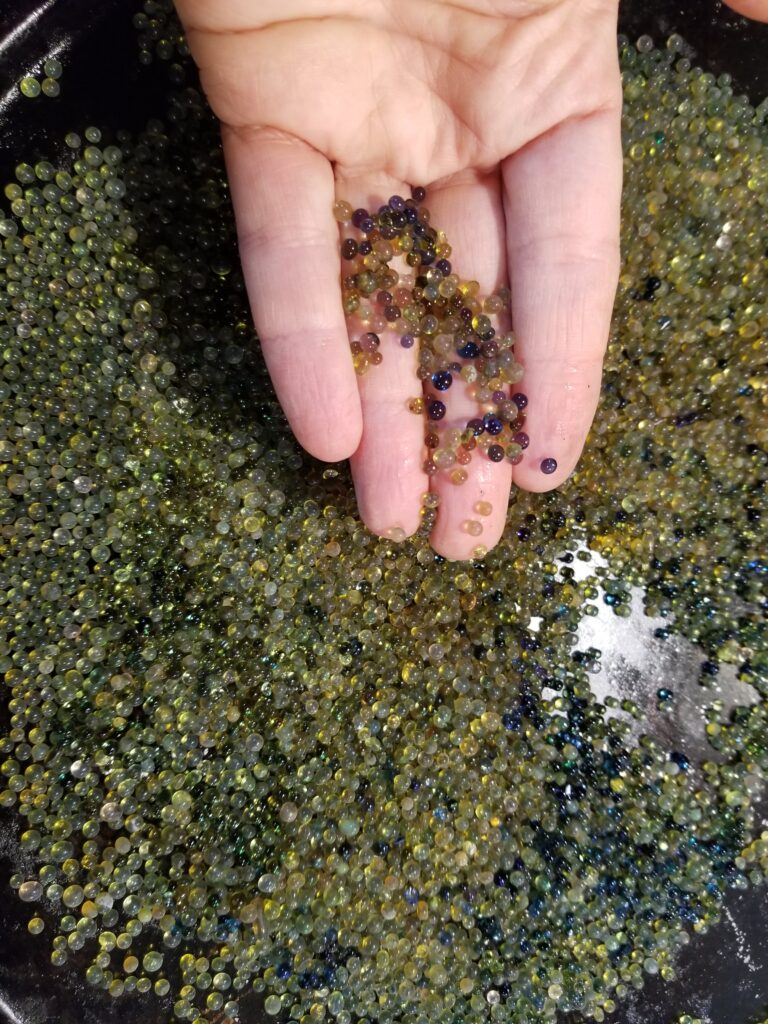
Green beads needing to be recharged 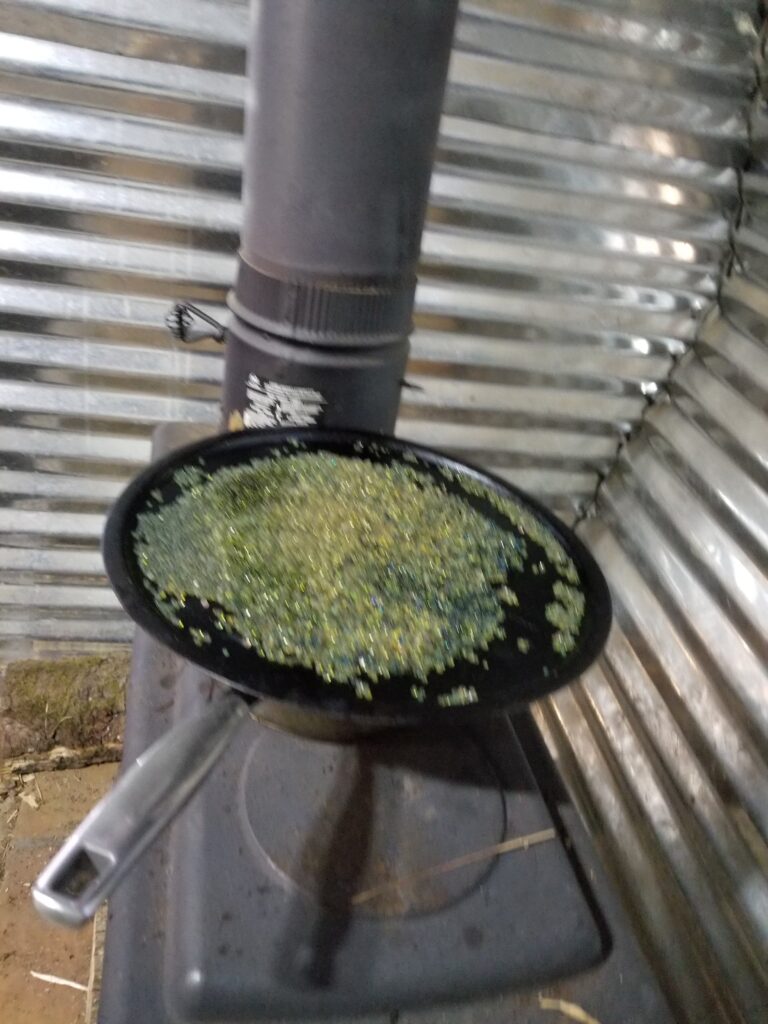
sitting on the little wood stove to dry
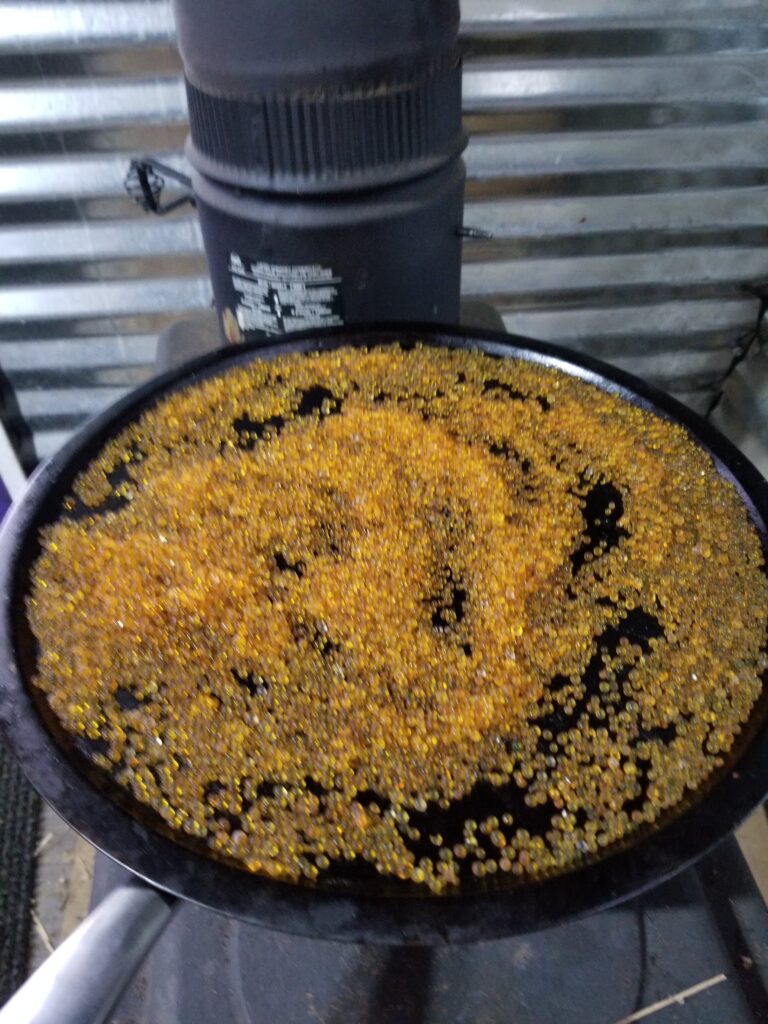
after about 45 minutes 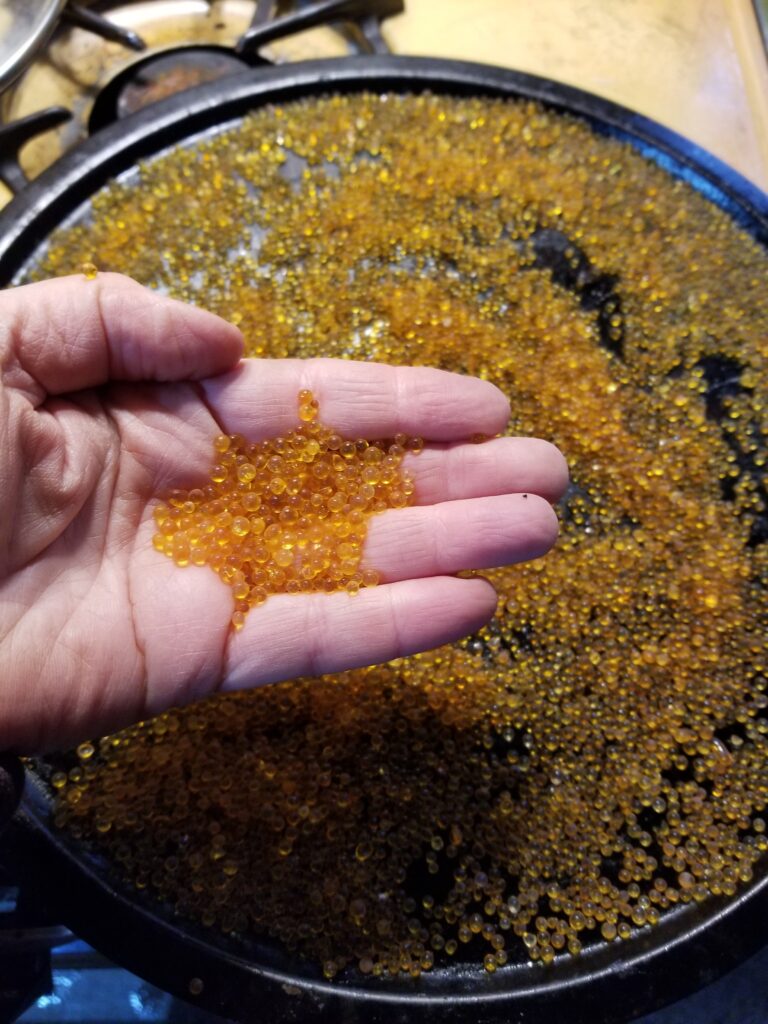
completely recharged
To make refilling the pouches easier, I emptied the tray into a bag, then poured the bag of beads into each pouch. I have recharged these beads several times and am very happy with the job they do. If I do spill them, I just sweep them up. Unlike when I spilled the DampRid tub which got liquid everywhere.
You don’t have to make pouches. You can place the beads in pretty jars and put them wherever you need a bit of moisture control.
Have you tried any of the moisture-control products on the market? What room do you find needs the most help? Post your tips and questions in the comments. I look forward to hearing from you!
These are affiliate links. If you follow a link and make a purchase, it costs you nothing and yet pays me a few cents referral. Thank you!
The hook and loop tape I used on my entire truck camper project, including these little desiccant pouches
The amazing Dry & Dry!
A fine mesh fabric, there are lots of colors besides this pale shade.
Double-fold bias tape makes it super easy to edge the pouches
Is it my computer or is something wrong with the links? I tried to click on them in Firefox and in Chrome and couldn’t do so with either. But your post is wonderful, with so many good ideas. I tried the Damp Rid years ago and, like you, quickly grew tired of the disposal, especially in my closets. I’m f=going to google Dry and Dry and see where I can find it. Thanks!
Phooey! I cant tell why the links aren’t working.
You can get it from Amazon. Search Dry & Dry Orange silica 1 quart. You can also get much larger containers but this is plenty to get started!
The problem is obviously with the fact that I’m using a desktop computer. 🙁